How To Make Recovery Usb For Mac El Capitan Terminal
Get the reliable and effective Mac data recovery softwares for Mac OS X El capitan to help you retrieve any data from Mac hard drive. Your Safe & Reliable Mac Data Recovery Software. Recover lost or deleted files, photos, audio, music, emails from any storage device effectively, safely and completely. Question: Q: Reboot fail after installing El Capitan help!! I Just jjust installed El Capitan on the latest Mac book pro rentina. I have tried to restart and it does not reboot.
I have the same problem and have restored twice with the same problem. I did run across this solution, but am to tired to try it right now. I do not plan to shutdown again until I can get it fixed on my other mac computer. Having the same problem on both.
Keep you posted. Either way, this is best fixed from Recovery Mode, but you shouldn't have to reinstall again to boot normally because moving the kexts in Recovery Mode should allow the boot process to continue as normal. Let me know how it goes. • So Boot into Recover Mode. • From the central menu open Disk Utility.
• Then select the 'Macintosh HD' partition, then the 'Unlock' from the 'File' menu (Skip this step if you can't see 'unlock') • Select the Get Help Online link from the meunbar to open Safari. • Navigate back to this thread. If you cannot boot, as was the case with me, start a recovery, either via internet or a thumb drive. It will not destroy everything so no clean install necessary.
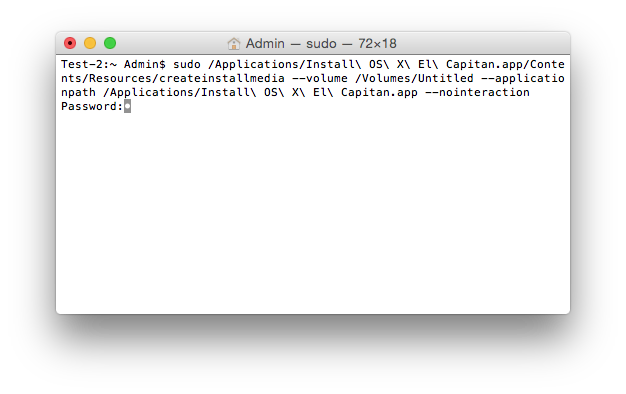
After startup do the following (I did everything with Finder): From OWC and edited by me: 1) Open Terminal in /Applications/Utilities 2) Enter 'system_profiler SPExtensionsDataType > ~/Desktop/kextList.txt' without the quotes and hit return (this will take a short while to run). 3) There should now be a kextList.txt file on your desktop, open it and press both the 'Command' and 'F' keys to bring up the find. 4) In the find field insert 'Not Signed' Copy the destination to the.kext file to a list for use later. Encrypt flash drive windows 10. (Click next to cycle through all of them.) Example: /System/Library/Extensions/JMicronATA.kext 5) Browse your drive to /System/Library/Extensions and create a folder by the name Unsupported, move any of the unsigned kext files to the folder Unsupported.
Delete the Kexts from their original location. 6) Browse in /Library/Extensions and create again a folder named Unsupported. Look if there are more unsupported Kext's and move them to the folder Unsupported. Delete the Kexts from their original location. 7) Beware that there may be Kext's that are 'not signed' that you want to keep because you may need them for programs known and trusted by you, so do not move them to the unsupported folder(s). If you did, no worries, you can always put them back later if there are troubles.
8) Reboot and you should be all set. This did the trick for me, hopefully for everyone.? Hey I ran across this fix and it worked for me on two machines.
Email this code to yourself, but change the machine name to YOUR EXACT machine name. Windows 7 update for mac. • cd '/Volumes/MacMini HD/Library/Extensions/'; mkdir Unsupported; mv Net* Unsupported; mv Sym* Unsupported; mv hp* Unsupported; mv ndc* Unsupported; cd '/Volumes/MacMini HD/System/Library/Extensions/'; mkdir Unsupported; mv Belc* Unsupported; mv Eltima* Unsupported; mv hp* Unsupported; mv Hua* Unsupported; mv Netg* Unsupported; mv Remo* Unsupported; mv RIM* Unsupported; mv USBEx* Unsupported; rm -Rf /Volumes/MacMini HD/Library/Filesystems/*fuse*; rm -Rf /Volumes/MacMini HD/Library/Application Support/Sym*; rm -Rf /Volumes/MacMini HD/var/folders/* Boot in Restore mode. Click OS help and Safari will open Open your email and copy the code Quit Safari and open Terminal from the top menu Paste the code and hit return.
Give it a minute or two. When it is done you will then be able to quit Terminal. Take each of these steps that you haven't already tried. Some of them may not be applicable to your model or your situation. Stop when the problem is resolved. To restart an unresponsive computer, press and hold the power button for a few seconds until the power shuts off, then release, wait a few more seconds, and press it again briefly. Step 1 The first step in dealing with a startup failure is to secure the data.
If you want to preserve the contents of the startup drive, and you don't already have at least one current backup, you must try to back up now, before you do anything else. It may or may not be possible. If you don't care about the data that has changed since the last backup, you can skip this step. There are several ways to back up a Mac that is unable to start. You need an external hard drive to hold the backup data. Start up from the partition, or from a local Time Machine backup volume ( option key at startup.) When the OS X Utilities screen appears, launch Disk Utility and follow the instructions in, under “Instructions for backing up to an external hard disk via Disk Utility.” The article refers to starting up from a DVD, but the procedure in Recovery mode is the same. You don't need a DVD if you're running OS X 10.7 or later.